ReFS is Microsoft’s new file system that will one day replace NTFS. It offers many awesome new features, particularly if you are using Storage Spaces and lots of disks. It scales beautifully, and has no fixed capacity limitations that matter in this day and age.
I’m no technical expert on ReFS, but we’ve recently run into an issue with an ReFS Cluster Shared Volume in Windows 2019 that was nice and yucky. Essentially, we’d been experiencing some issues with a Windows 2019 Hyper V Cluster resulting in storage becoming unavailable. The error generated was a useless generic “An Unexpected Error Occurred.” We opened a support case with Microsoft, and after some basic testing came to the conclusion that the error might have been caused be a specific registry setting, and so brought our storage online.
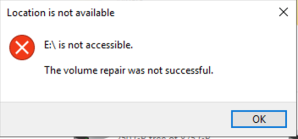
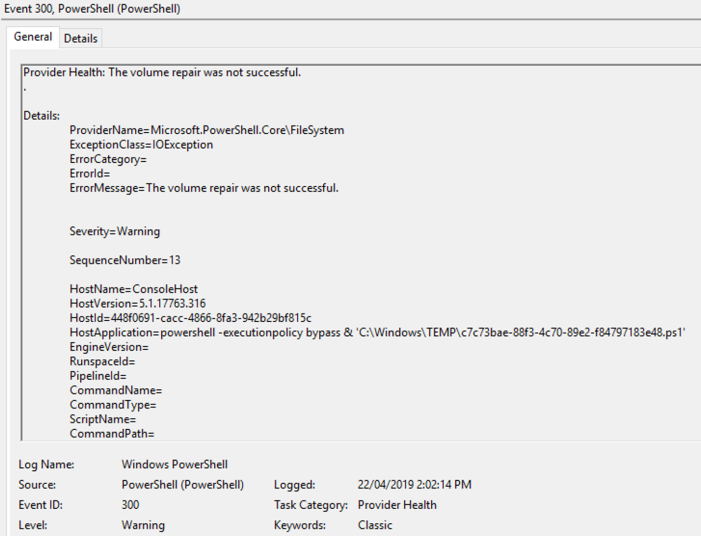
Except that it didn’t come online. Instead we got hit with a classic ReFS RAW Volume; essentially a disk that Windows could see, but was unable to mount. Doing some investigation, it looked like all the data was there, but just the metadata was obstructed in some way. Windows provides “really helpful” error messages:
We really wanted to get the data that was on this disk to avoid having to roll back to an earlier backup.
After much anxiety (and googling) we decided to try a few strategies to get the data back. First of all, we tried ReclaiMe. ReclaiMe is a commercial tool that allows you to do data recovery from a number of volumes. ReclaiMe started out really well. It found all the files we were expecting to find on the volume, and displayed them in the tree. We provisioned a new NTFS volume and ran the data recovery; however the majority of the data we recovered was unreadable. We could see that it should be working, but couldn’t understand why it wasn’t.
I did a lot more reading on ReFS. It turns out that MS has several versions of ReFS, and the current version is 3.4 (as of Windows 2019 and the Windows 2016 1803 update). ReclaimMe identified the disk as a ReFS 2 volume. While the differences don’t necessarily explain why it might not work, I had a hunch that maybe the reason the restore wasn’t working correctly was because we were in fact on too new a version of ReFS for the ReclaiMe software to work.
A few weeks ago, Anton Gostev from Veeam wrote about a new, otherwise undocumented tool in Windows 2019 called “refsutil”. This tool provides a mechanism to triage and recover failed ReFS volumes. The post in the Veeam digest indicated that it existed, was probably good, but no one really knows what it does. There is almost no documentation or information about this tool, but it saved the day for us – and so I thought it was worth noting down some useful things we learnt about how to use the tool. Much of our learning was greatly assisted by this article.
You can see all of the options available in ReFSutil for data salvage by running “refsutil salvage” with no options.
Knowing that our volume had data, the first thing we wanted to do was to verify if ReFSutil could see the corruption. Fascinatingly, ReFSutil thought everything was fine:
C:\salvage>refsutil salvage -D E: C:\salvage -x -v
Microsoft ReFS Salvage [Version 10.0.11070]
Copyright (c) 2015 Microsoft Corp.

Local time: 4/21/2019 2:29:57

Option(s) specified: -v -x

ReFS version: 3.4
Boot sector checked.
Superblocks checked.
Checkpoints checked.
No corruption is detected.
Command Completed.

Run time = 7 seconds.
To explain, “-D” says “diagnose” why the volume is failed. “E:” is the drive that was not mounting (our corrupted ReFS volume). “C:\salvage” was the directory where we were storing metadata about the recovery process. “-x” means “unmount the volume” before we go (if we didn’t do this we had access denied errors) and “-v” means be verbose about the output.
As described in the output above, there were no issues on the volume. Yet Windows would not mount it. This gave us a high degree of confidence we probably could recover the data. It also gives us a high degree of confusion as to what is actually wrong with the volume.
The next step was to run a Quick Scan to pull out all of the metadata we needed, and a list of files that ReFSutil was comfortable we could recover.
C:\salvage>refsutil salvage -QS E: C:\salvage\ -v -x
Microsoft ReFS Salvage [Version 10.0.11070]
Copyright (c) 2015 Microsoft Corp.

Local time: 4/21/2019 2:27:17

Option(s) specified: -v -x

ReFS version: 3.4
Boot sector checked.
Cluster Size: 65536 (0x10000).
Cluster Count: 486601728 (0x1d00f400).
Superblocks checked.
Checkpoints checked.
4363 container table entry pages processed (0 invalid page(s)).
1 container index table entry pages processed (0 invalid page(s)).
Container Table checked.

Processing 1 of 2 object table pages (50%)...

Object Table checked.

Examining identified metadata disk data for versioning and consistency.

9104 disk clusters analyzed (200%)...

Examining volume with signature a0e4914d for salvageable files.
8726 container table entry pages processed (0 invalid page(s)).
2 container index table entry pages processed (0 invalid page(s)).
Validating discovered table roots on volume with signature a0e4914d.

86 table roots validated (100%).
Enumerating files from discovered tables on volume with signature a0e4914d.

86 tables enumerated (100%).
Command Completed.

Run time = 22 seconds.
With regards to the options, “-QS” said perform a “quick scan” to look for files on the disk. There is also a Deep Scan option that will scan on a block-by-block basis for data. We didn’t believe we needed this as there was actually no evidence of actual corruption. As before, “E:” is the volume that was not mounting, “C:\salvage” is the location we were saving our working data, “-x” meant unmount the volume before we begin and “-v” meant be verbose about the output.
This ran successfully, and created a bunch of output in our working directory.
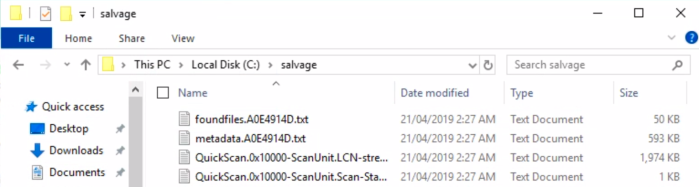
Of these files, the most useful for us is the list of files that ReFSUtil thought it could recover. Here’s a sample of what that looks like:
Volume Signature: 0xa0e4914d

...

Identified File: \VMSMB01\VMSMB01_TimeMachine.vhdx
Size (0x428400000 Bytes) Volume Signature: 0xa0e4914d Physical LCN: 0x6186a = <0xc586a, 0x0, 0x0, 0x0> Index = 0x2
Last-Modified: 04/16/2019 04:56:56 AM TableId: 0x783'0 VirtualClock: 0x87668 TreeUpdateClock: 0x0

Identified File: \VMSWAN01\Virtual Hard Disks\VMSVWAN01_D.vhdx
Size (0xb3e400000 Bytes) Volume Signature: 0xa0e4914d Physical LCN: 0x60265 = <0xc2a65, 0x0, 0x0, 0x0> Index = 0x2
Last-Modified: 03/25/2019 05:03:18 PM TableId: 0x735'0 VirtualClock: 0x64559 TreeUpdateClock: 0x2
One of the important things to note is that you can edit this file to build a subset list of files you want to restore; which means you don’t need to do everything at once, or can prioritise key systems and data.
Here is an example of just restoring the two files in the index above:
C:\salvage>refsutil salvage -SL E: C:\salvage F:\restore C:\salvage\restorefiles3.txt -v
Microsoft ReFS Salvage [Version 10.0.11070]
Copyright (c) 2015 Microsoft Corp.

Local time: 4/21/2019 2:56:57

Option(s) specified: -v


Processing C:\salvage\restorefiles3.txt
8726 container table entry pages processed (0 invalid page(s)).
2 container index table entry pages processed (0 invalid page(s)).
Copying: \\?\F:\restore\volume_a0e4914d\VMSMB01\VMSMB01_TimeMachine.vhdx...Done
Copying: \\?\F:\restore\volume_a0e4914d\VMSWAN01\Virtual Hard Disks\VMSVWAN01_D.vhdx...Done
Command Completed.

Run time = 30125 seconds.
“-SL” means copy all the files in the “Source List”. “E:” is again our corrupted volume. “C:\salvage” contains the metadata we extracted in the “QS” step. “F:\restore” is where we are putting our recovered data copies. “C:\salvage\restorefiles3.txt” is our edited data set containing the files we wish to restore, “-x” meant unmount the volume before we begin and “-v” meant be verbose about the output.
From here, we were able to reattach the disks to the virtual machines, and win!
So what did we learn?
- It’s probably not worth paying for a commercial data recovery tool for most ReFS failure scenarios. The built in ReFSutil is powerful, current and works for even recent versions of the ReFS file system
- Even if Microsoft Support tells you everything is OK, it’s probably worth double checking that it actually is. Sometimes they are wrong.
- Make sure you have current/recent backups. (We did, but we wanted to get the most recent data.)
- Think twice before you use ReFS in a cluster file system; the tools and techniques for dealing with problems relating to it are not as robust as those for other file systems – and we still have no root cause/reason for the corruption that occurred.
- Make sure you have tested the escalation process on your MS support case before your engineer goes off-shift, in case it’s magically broken.
(Many thanks to Lachlan, Dave and Dave who were instrumental in the process of puzzling this out.)

Thank you Andrew, you just saved 5TB of my data.
My windows server 2016 borked a ReFS drive after a windows update. Unfortunately WS2016 does not come with refsutil.exe. However it is possible to do an in-place upgrade from 2016 to 2019. After the upgrade i just followed your instructions and refsutil is recoving my files.
LikeLiked by 2 people
Thank you Andrew!!
This worked perfectly for me, i had a 2016 hyper-v using REFS on an iscsi share, after a physical host reboot, i noticed all my VMs coming up with saved-critical status. Checking iscsi and disk management showed that the volume had somehow corrupted and reverted to a RAW format.
I followed your advice, created a 2019 server and used your commands exactly (with changes to drive letters to suit my needs) and it has recovered my missing VMs.
Life saver!
LikeLiked by 1 person
Thanks for details
However, I’ve encountered the following when trying to recover corrupt Mirrored ReFS drive when one drive stopped working. Instead of allowing access to data on the good drive, ReFS reset the drive and now shows up as empty. Have disconnected the bad drive and get the following share access flag issue when running the salvage command. Anyone have any ideas?
C:\WINDOWS\system32>refsutil salvage -FA 😀 C:\salvage\working C:\salvage\ -v -x
Microsoft ReFS Salvage [Version 10.0.11070]
Copyright (c) 2015 Microsoft Corp.
Local time: 10/7/2019 18:38:54
Option(s) specified: -v -x
Error: Failed to open volume: \\?\Volume{5286ebf0-0db4-4daf-9d8e-b4468d761232}
Error: The process cannot access the file because it is being used by another process.
Error: Failed to open volume.
Error: A file cannot be opened because the share access flags are incompatible.
Error: Initialization failed.
Error: A file cannot be opened because the share access flags are incompatible.
Run time = 0 seconds.
C:\WINDOWS\system32>
LikeLike
This is a downright awful situation. I would recommend two things:
– if you have MS support, open a case. They do have an ReFS team that can help in cases like this, provided the case is routed to them.
– have you rebooted? It’s possible the metadata store is actually locked. It’s also possible that a mount operation attempt is going on, and that’s why the datastore is locked. Wait a little while (maybe 30 minutes) and try again.
Unfortunately I think neither of these answers are overly helpful, but worth a try.
LikeLike
Thank you Andrew!!
My computer use Windows 10 and I am having the same problem as you. However, I don’t have the backup file of the disk corrupted. I am very worried about my data being lost. I use Reclaime File Recovery, it’s good because i found my data. I think my data stilled. Can you ask me if the data after the recovery using Refsutil is organized in a directory format? And does it have the right name?Can you help me, please?
LikeLike
Hi Andrew,
I would like to ask if I can give you a team viewer access in to our server to asses our situation.
We were upgrading to Datacenter 2019 when our fileserver, which is on server 2019 got all use files corrupted( can be seen them with but cnt open). Suspect deduplication issues. Virtualised with hyperv
We are willing to pay for recovery.
LikeLike
Thanks! Your article helped restore 3 Vms in our environment. Now deciding to use NTFS for our cluster in Hyper V Hosts and not ReFS.
LikeLike
Thanks for sharing Andrew. I had same issues, partially recoverd some files and have now banned the use of ReFS in my company. Whats your position on ReFS for critical data? I dont think it is fit for purpose.
LikeLike
Have you had any luck with the triage option? I’ve got to try and fix corruption it found with no additional disks involved. (Nowhere to recover TO) When I ran the Quickscan it came back with this:
Warning: Cannot find root info for Table[0x733’0] on volume with signature f50e73ad!
Directory name and info are lost because of corruption/writes.
Warning: The object was not found.
30 table roots validated (100%).
Enumerating files from discovered tables on volume with signature f50e73ad.
I tried the Triage but can’t seem to summon the right demons on what it means by “An invalid directory ID was provided. The directory ID is the upper 64 bits of the file ID.”
LikeLike
Sorry, no I haven’t had to use this particular option set!
LikeLike
Hi @all!
I ran into the same problem – Hyper-V Failover-Cluster with ISCI LUN formated with ReFS. Than we had a PowerFailure an the ReFS Filesystem brokes to RAW. With R-Studio I could Recover the most important VHDs. But it would be nice to get additional Files back… I tried your solution described above with the ReFS util, but can you explain me how the C:\salvage\restorefiles3.txt File must look like? Because refsutil said, he could not find any file in the restorefiles3.txt…
Thanks,
Benedikt
LikeLike
The QuickScan (or DeepScan) option builds a list of files that could be restored. We edited this list of files to a smaller list we actually wanted to recover. This looked like the text snip. We called this file restorefiles3.txt. This was the same as the output of the scan but with some lines for files we didn’t want deleted.
Hope that helps!
LikeLike
I am having issues where it does not like the restorefiles3.txt Idicating no restore files available.
The file is identified. Any ideay why? File looks like this:
Volume Signature: 0x23be0c6a
Identified File: \SYSSHARE\PACKETS\2-PMI 2020\2020 PMI CAPITAL ONE CREDIT CARD STMTS.xlsx
Size (0x98117 Bytes) Volume Signature: 0x23be0c6a Physical LCN: 0x64c6d42 = Index = 0x10
Last-Modified: 12/28/2020 05:17:32 AM TableId: 0x3ceef’0 VirtualClock: 0xc3c44 TreeUpdateClock: 0x2a1
LikeLike
Hi andrewayger thanks very much for your helps. I did a quick search, but it couln’t find anything, then I started a full scan.It created foundfiles.txt and listed all files. But I couldn’t recover files. I created a txt file with just some lines of foundfiles.txt.
refsutil salvage -SL K: C:\salvage\ Y:\restore C:\salvage\testfiles1.txt -v -x
But it says: “Processing C:\salvage\testfiles1.txt
No salvageable file found in C:\salvage\testfiles1.txt!
Command Completed.”
What does it mean, is there any typo problem with testfiles1.txt?
Could you share a sample for text file to recover?
Sincerely
LikeLike
The key with the salvage file is to copy your output from the scan and remove the lines you do not want to recover. The tools are quite sensitive to the file format.
But there is always the chance that the files are, in fact, not recoverable. Which sucks. 😦
LikeLike
Thank you very much! You just saved my day!
LikeLike